
WordPress Full-Site Editing, aka the Site Editor, offers a lot of features, not all of which you might be familiar with. That’s because it’s not only a relatively new addition to the WordPress platform but also under constant development with new features coming out regularly. As a consequence, it’s easy to miss out on some things.
In order to help you get the most out of the WordPress Site Editor, in this post we will go over some features you might have overlooked. Some of them are bigger, some smaller. However, all of them can help you build better designs and customize your site more effectively — if you know about them.

1. Change Style Variations
Le’s start off with style variations. While these are a fairly central feature of the WordPress Site Editor, if you are not aware of them, you are missing out big time. Therefore, let’s cover them quickly.
So, what are they? If you open up the Global Styles menu (the black and white circle icon in the upper right corner), you find an option at the top that says Browse styles.
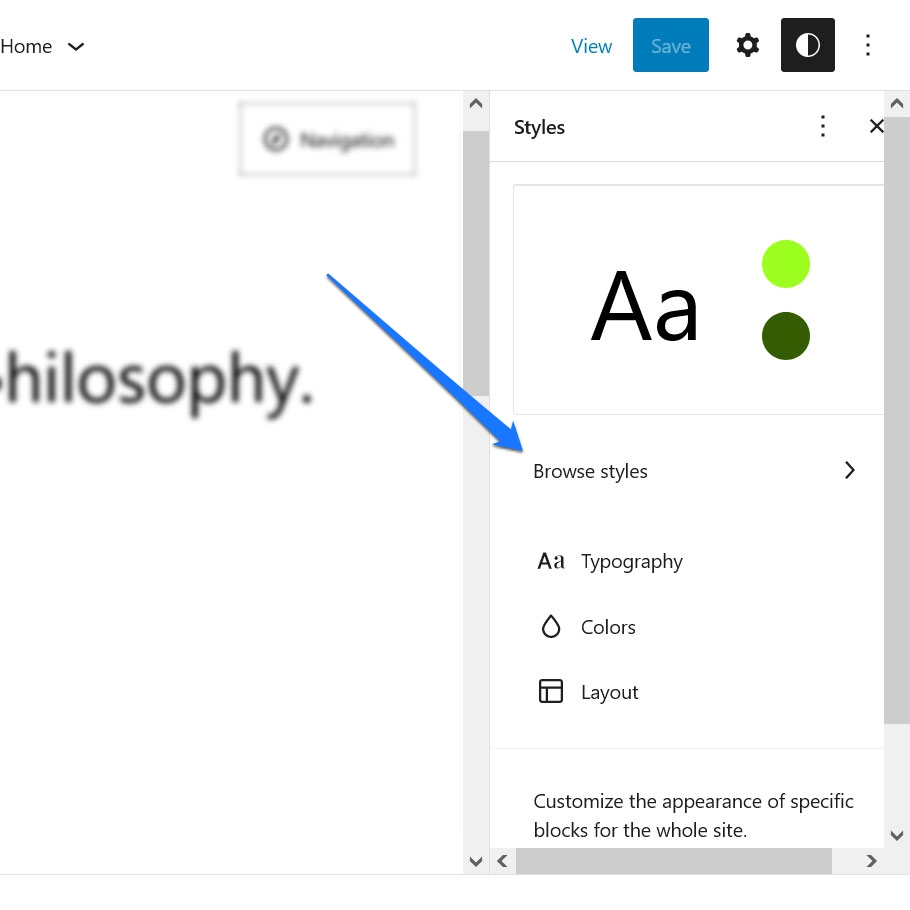
Here, theme developers are able to include one or more style variations for their themes. For example, in the Twenty Twenty-Three theme, you will find a whole list of available variations right there.

Click on one and the site preview on the left will immediately take over its style presets.
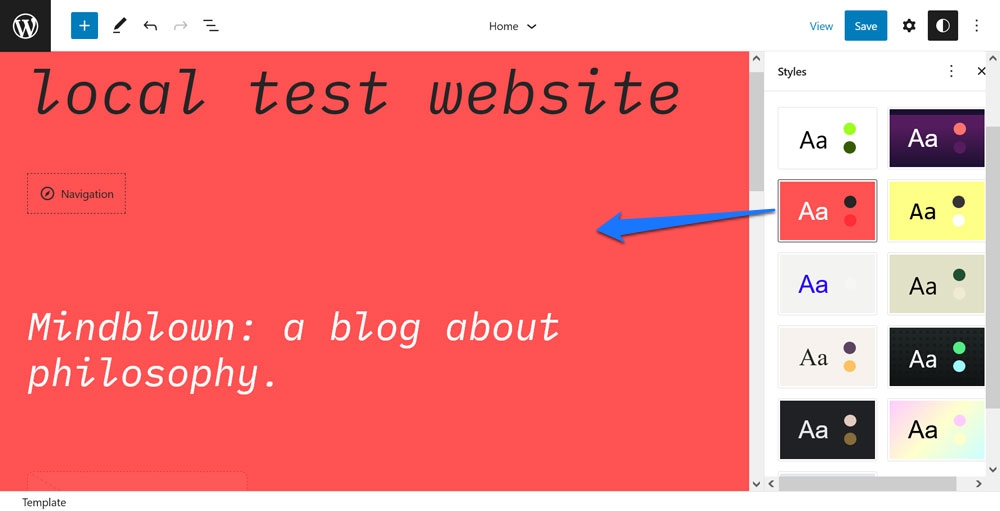
We are talking font, font style, background colors — the works. Save it and your site will adopt the same design. Basically, you can change the entire look of your theme with a single click. This gives you great variety for your site, inspriation, and several starting points to add your own flavor.
2. Edit Styles for Individual Blocks
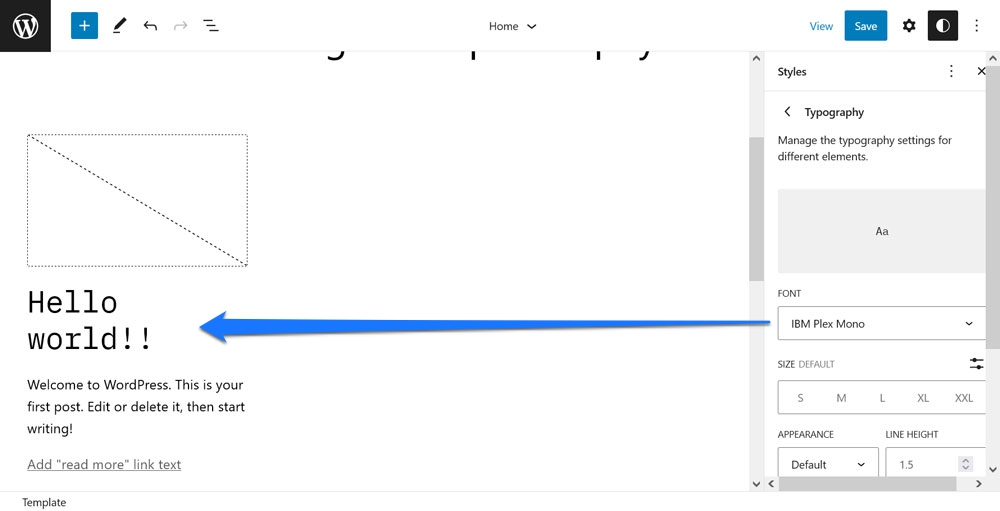
In the Global Styles menu, you also find another option that is sometimes a little neglected. Under Blocks at the bottom, you can make changes to individual types of blocks that will apply sitewide.
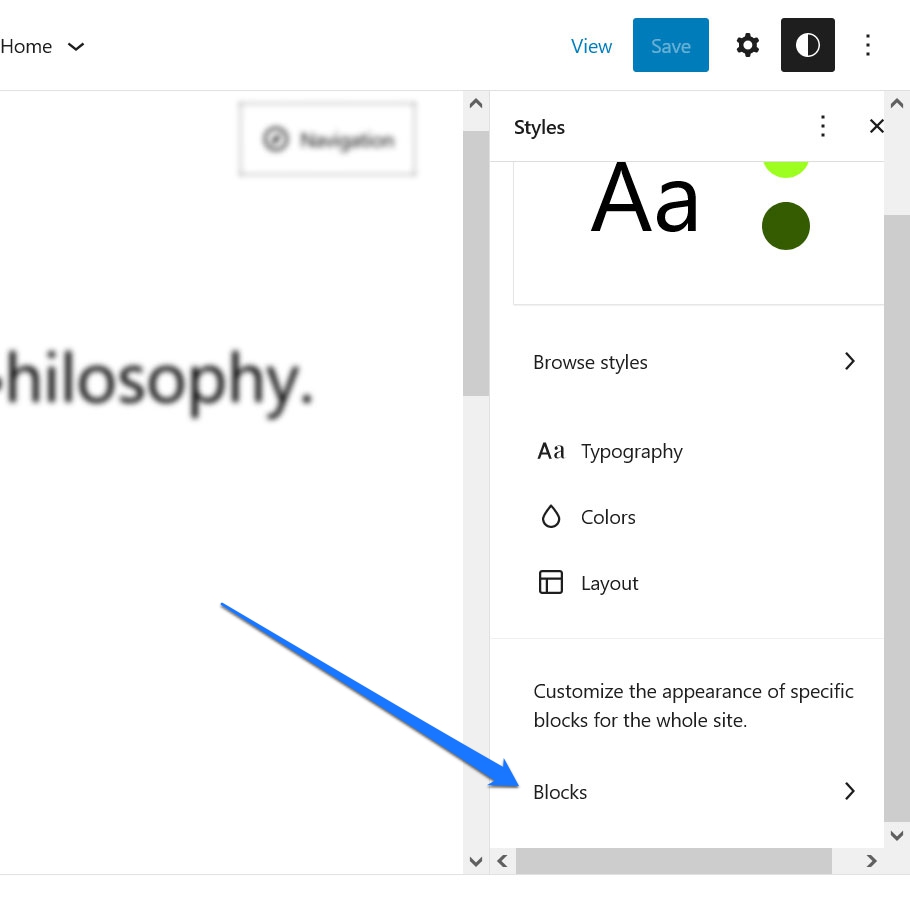
That can be anything from changing fonts and font styles, to assigning colors to backgrounds, links, and buttons, and making layout changes.
For example, want to make sure all Post Title blocks on your site use the same font style and color? Nothing easier than that.
First, search for it by name or in the list.
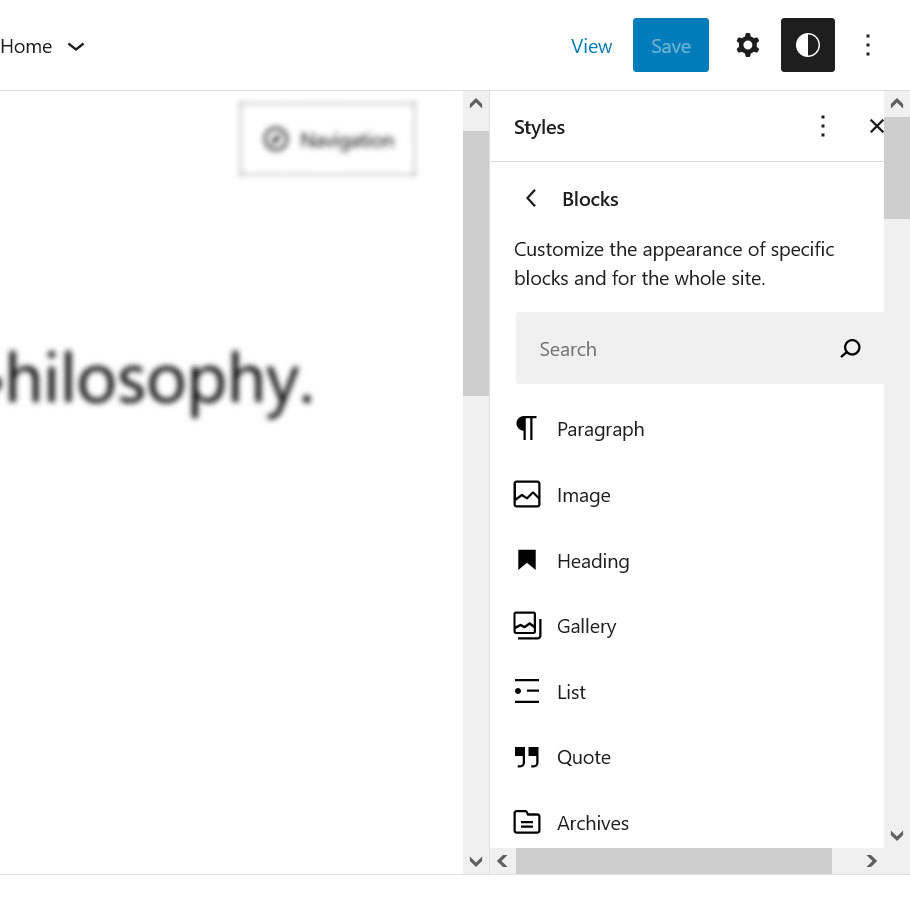
After that, make any changes to the typography and color settings you need. Once done, they will apply wherever this block occurs on your site (unless overwritten on an individual basis).
Beats having to do updates manually across different templates.
3. Work With Page Templates from the Post/Page Editor
This technically doesn’t happen inside the Site Editor but its cousin, the Template Editor. However, the two are so closely related that we will let it slide for the moment.
You might not be aware of it but when editing posts and pages, it’s possible to edit their individual templates or even build custom templates without the need to go back to the main Site Editor.
You find that option when you click on the name of the current page template on the right. It is located under Template in the options menu on the right.
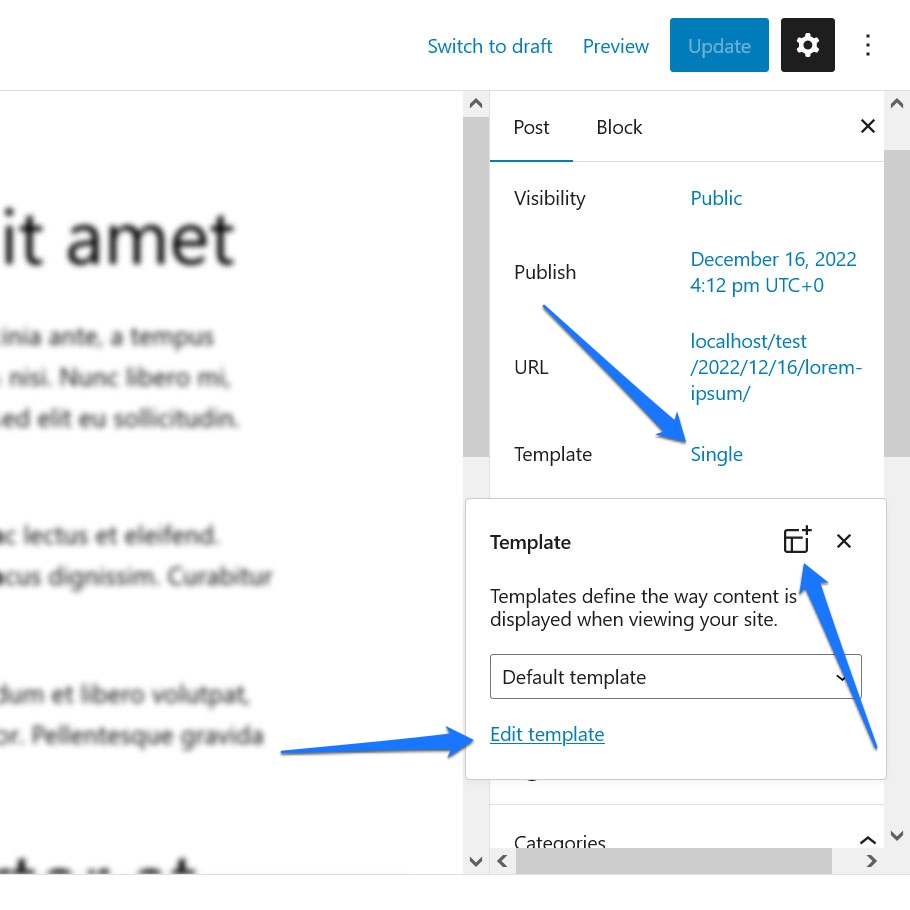
Pick a template from the drop-down menu and click on Edit template at the bottom to make changes to it. Alternatively, there is also the icon in the upper right corner for adding a new custom template. Either of those will take you to the Template Editor below.
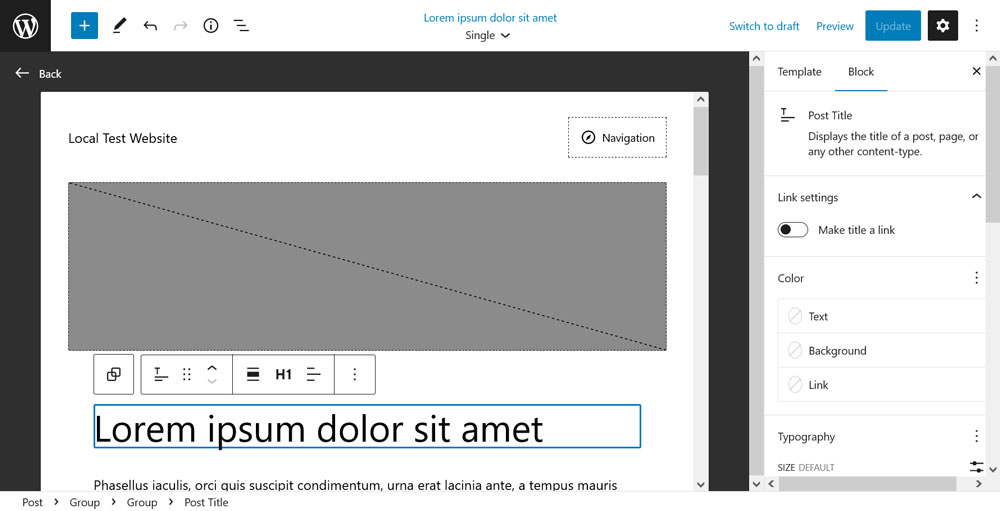
It’s a pared down version of the Site Editor, however, equally powerful. You can perform tasks like switching the position of your featured image and title, moving around elements, or even inputting a new header or footer. Upon save, the changes will apply to any page on your site that uses this template.
4. Customize Block Templates
One of the features of the Site Editor, and the WordPress block editor in general, is that they come with a bunch of blocks that, upon further inspection, actually consist of several other blocks. Examples include the Comments or Post Content blocks.
If you look at them in list view, you can see that they actually have many parts.
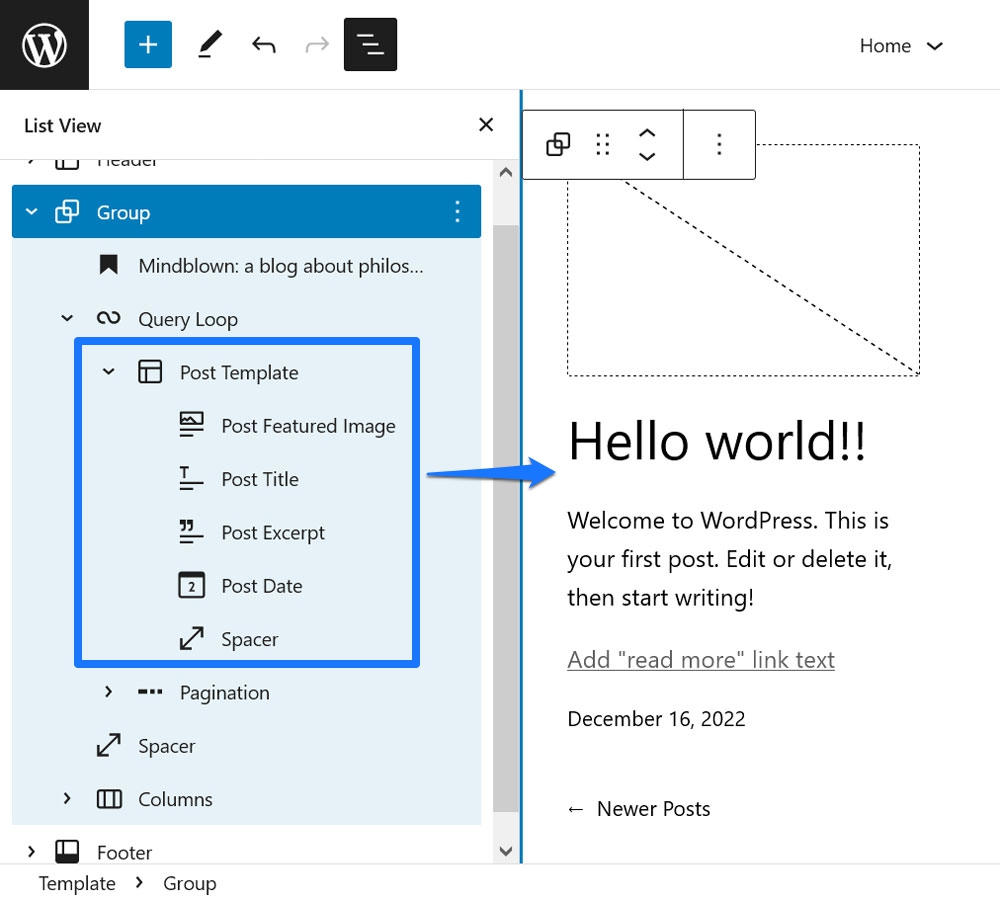
This gives you the flexibility to determine the order and layout of the elements that. For example, if you want to invert the order of Post Featured Image and Post Title, you can do so in the usual ways (e.g. via drag-and-drop or using the arrow icon).
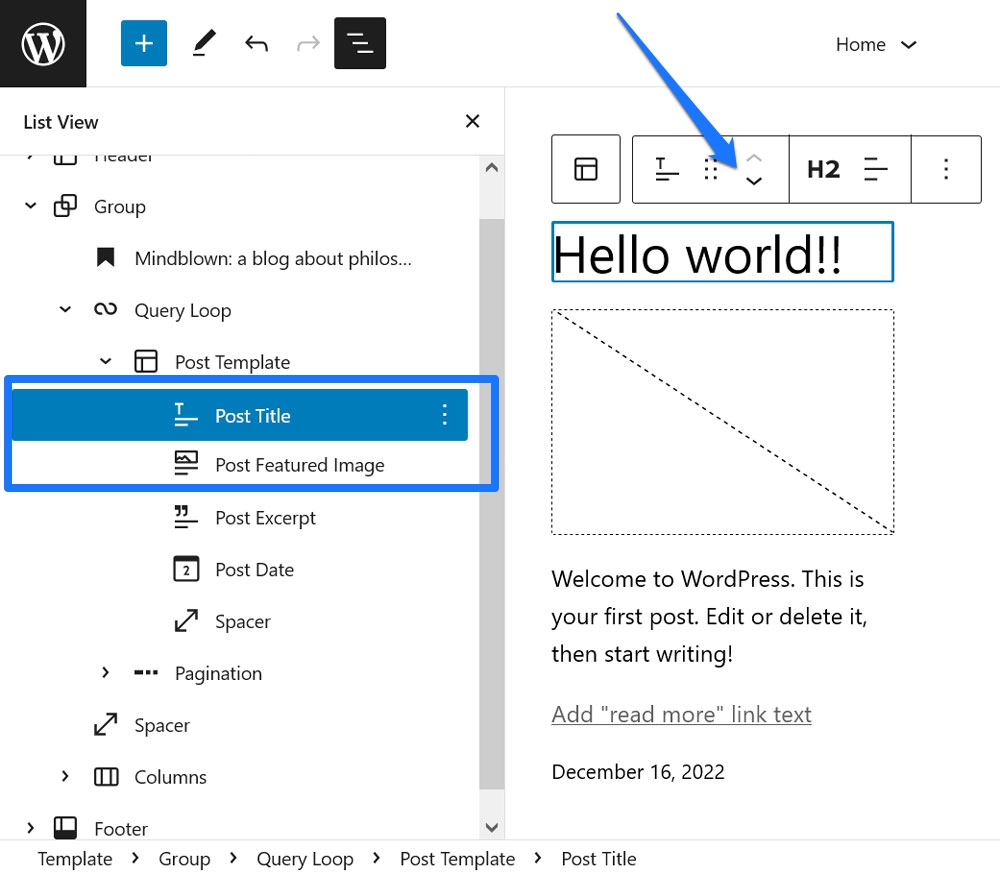
The powerful thing about this is that, any changes you make here, apply to all site elements built with this block. For example, making changes to one of the articles in your Query Loop block will automatically do the same to the rest of them.
5. Install Blocks on the Fly
Ever found yourself in the Site Editor thinking something like “man, I wish I had an XYZ block”? Maybe you would like a table of contents block, an image slider, or a popular-posts widget.
There are plenty of Gutenberg block plugins to add this kind of functionality to your site. However, WordPress also features a a way to install singular blocks right inside the Site Editor.
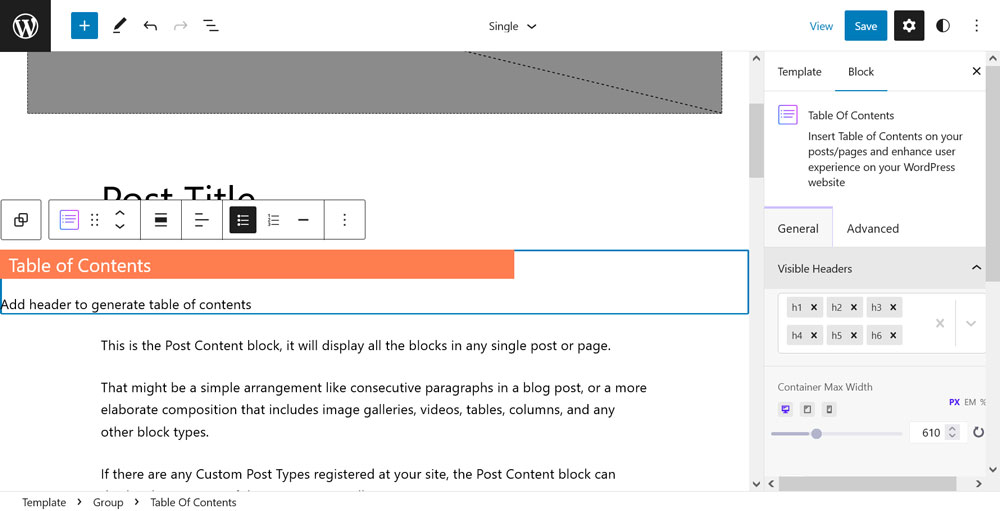
For example, say you are looking to add the aforementioned table of contents. For that, go to the block inserter (the blue button with a plus in the upper left corner) and type that keyword into the search field at the top. While you might not find anything available on your site, you will quickly see a section called Available to install at the bottom with relevant block results.
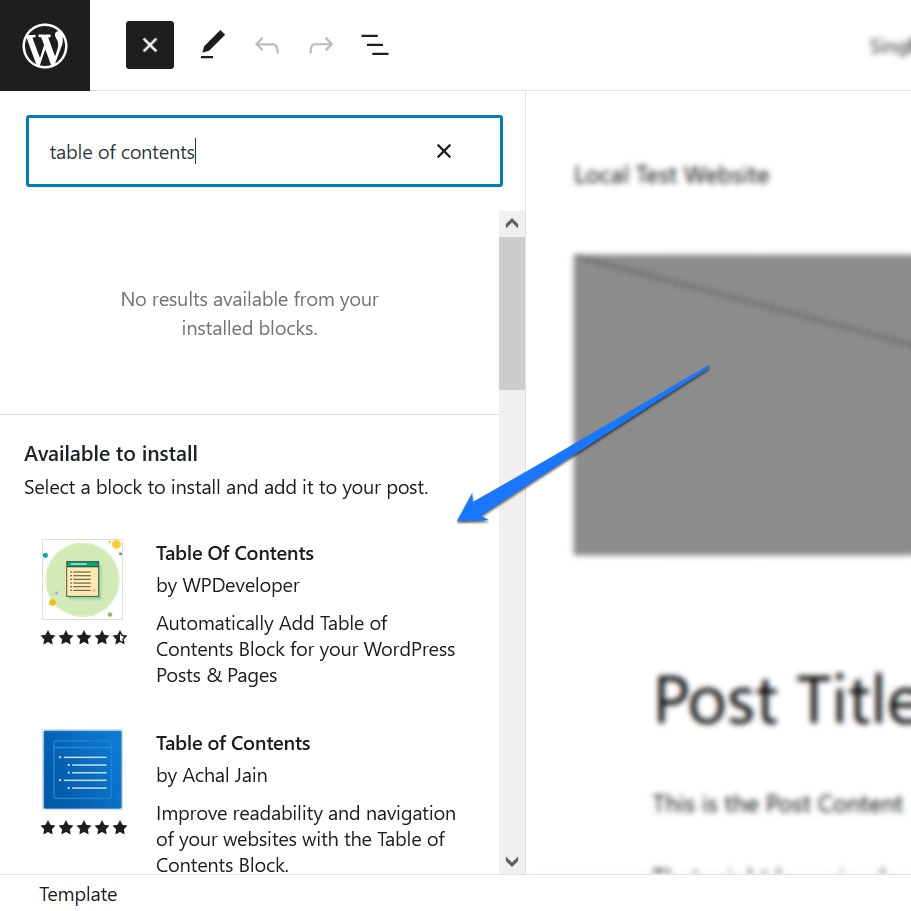
If one of them sounds promising, simply click it to install the block on your site. It also immediately inserts the block into the current page where you can test drive and configure it.
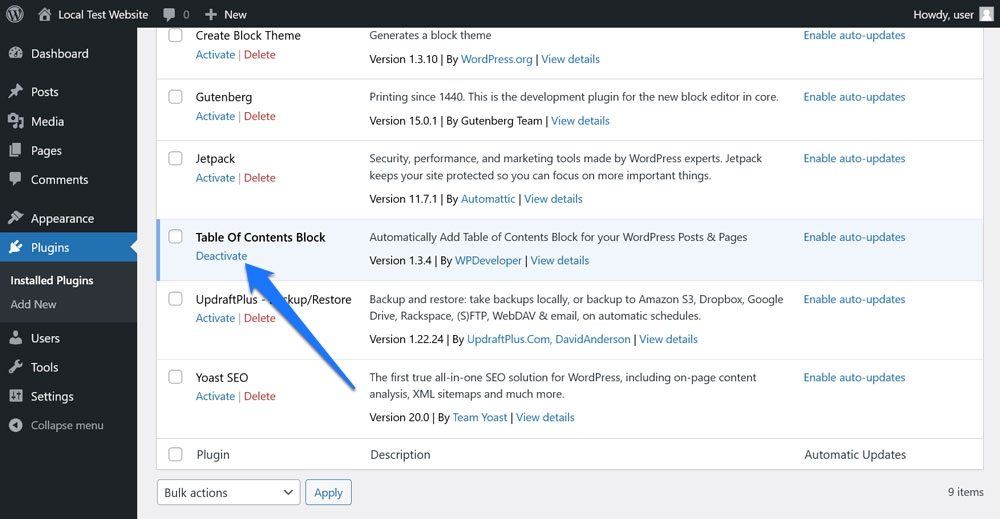
Neat, right? Plus, if it turns out that one or more of the newly installed blocks don’t really do it for you, you can always deactivate and delete them from the plugins menu.
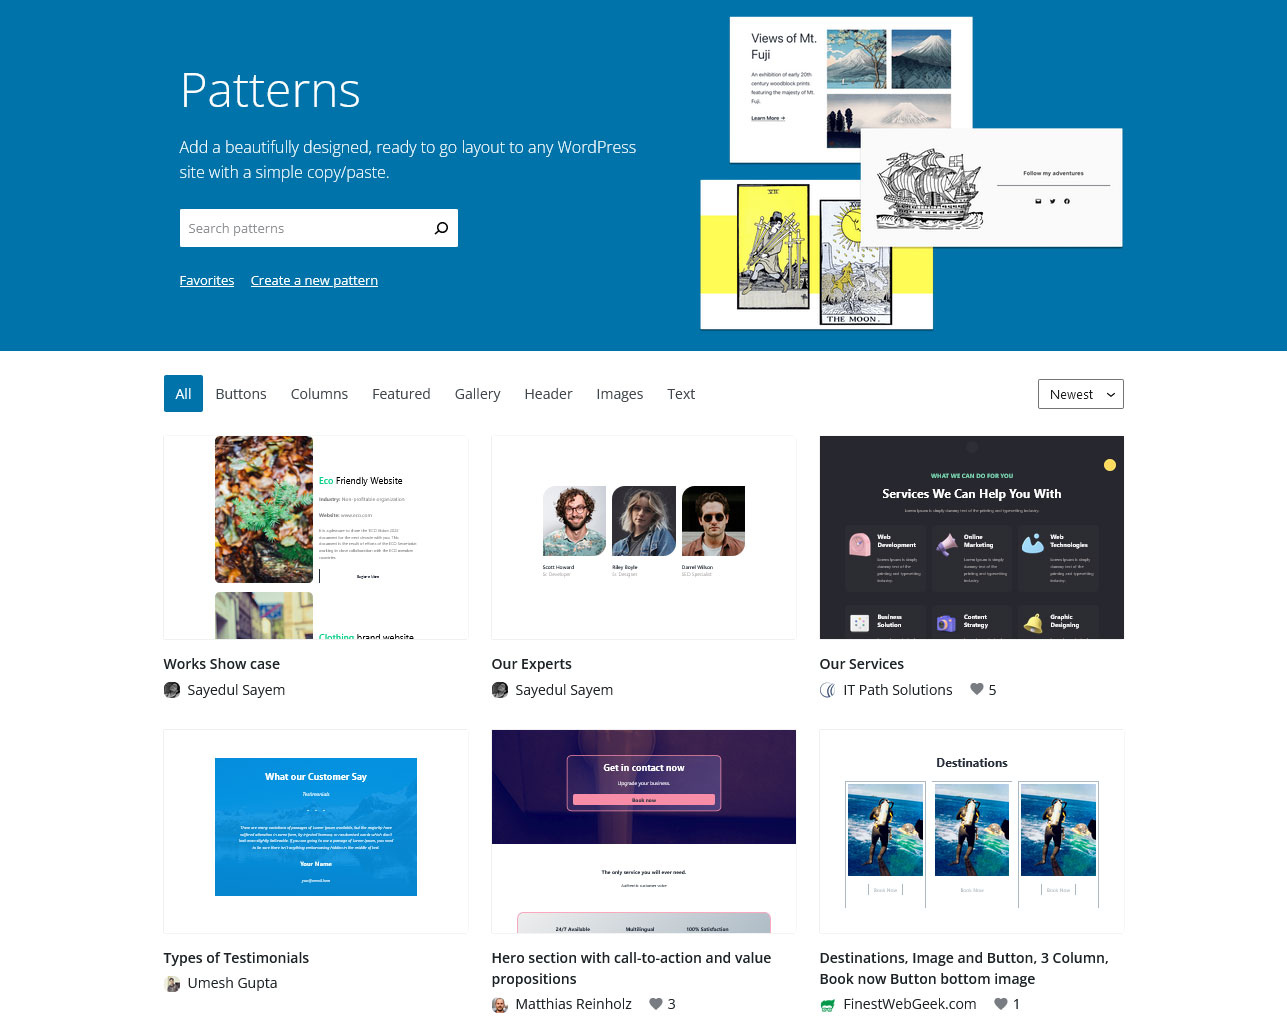
6. Import Blog Patterns via Copy and Paste
A second feature that creates a lot of flexibility is the possibility to easily import block patterns into the editor. We have already written about this in detail in our pattern directory tutorial, so here is the short version.
Go to the WordPress pattern directory and look for a block arrangement that you like. The filters and search field are useful for that.
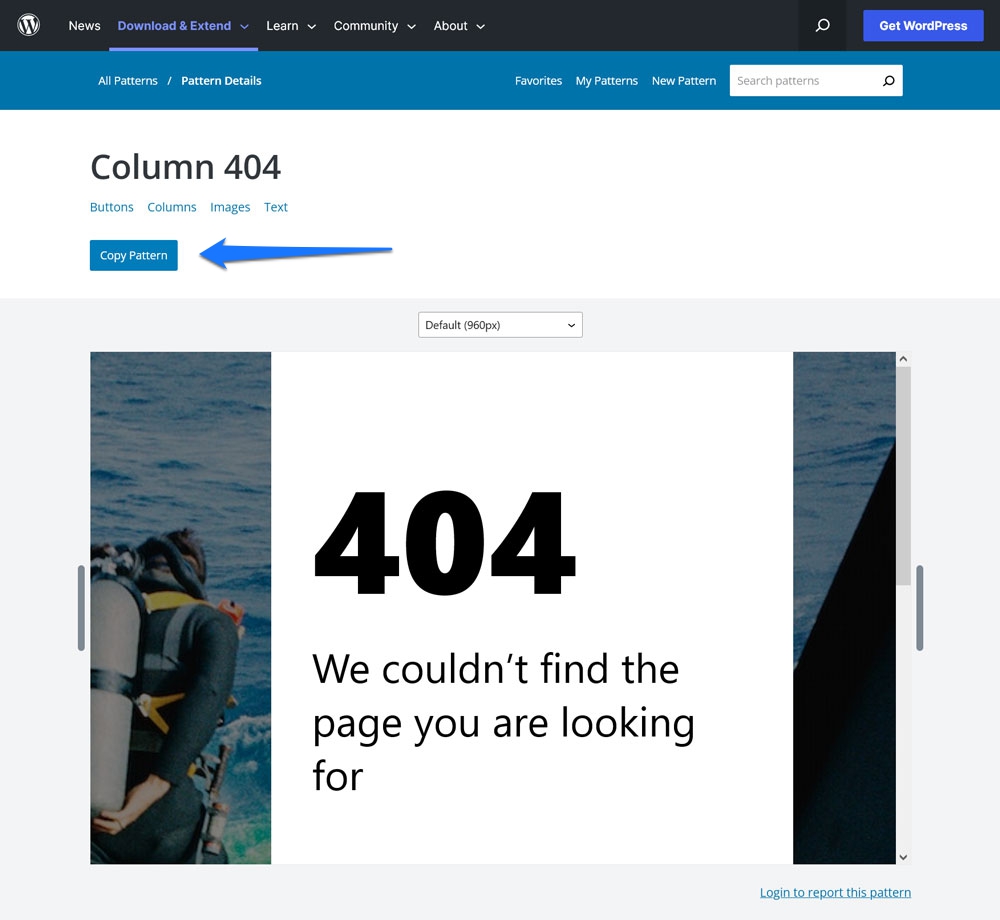
Once you have found something, click on it to get to the pattern page. Here, simply click the Copy Pattern button at the top.
Then, go back to what you are working on in the Site Editor. Place the cursor where you want the pattern to appear and paste.
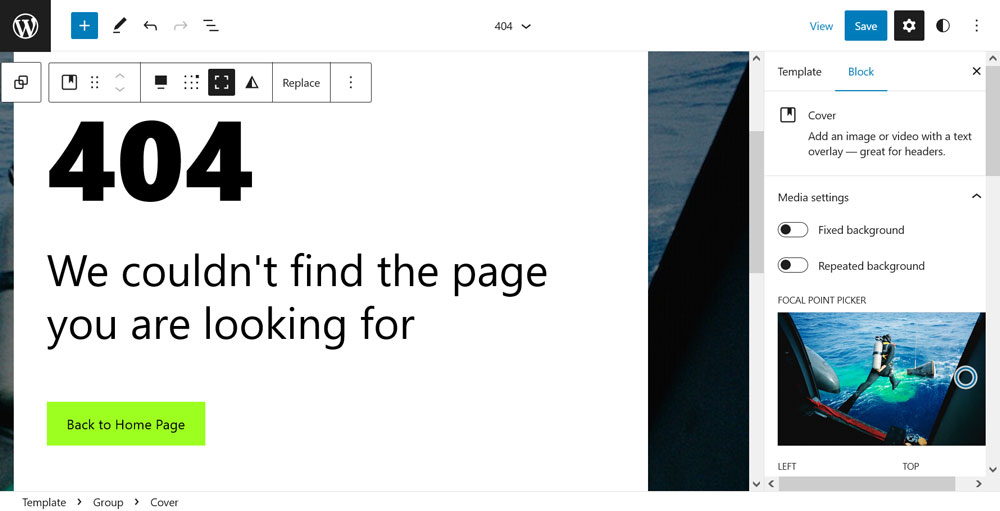
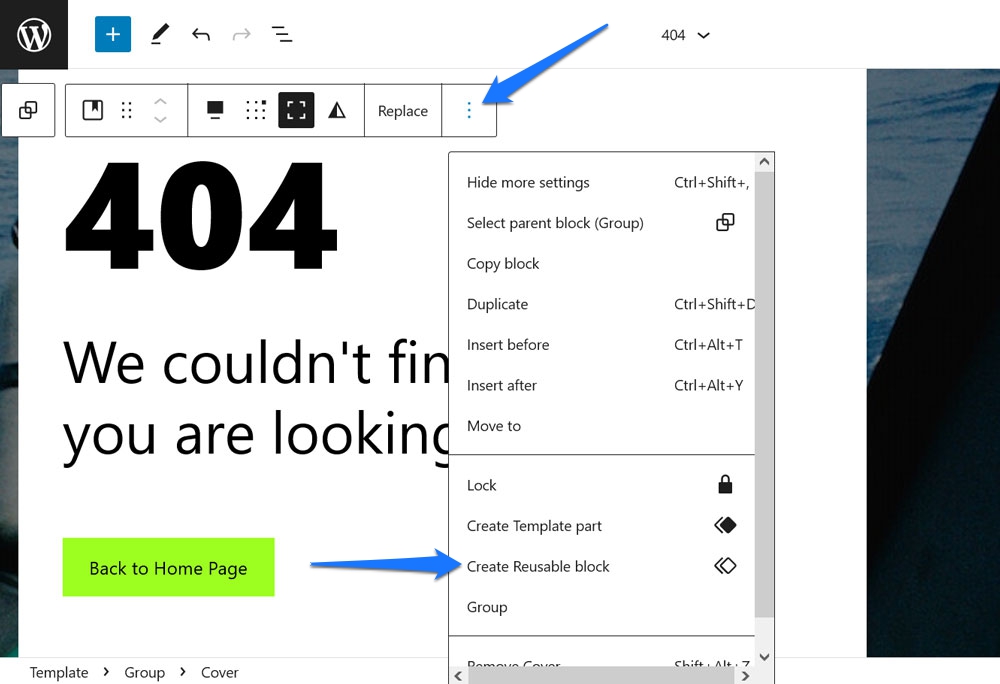
That’s it. The pattern is now in your content, complete with any images belonging to it. If you think you will want to use it again later, don’t forget to make a reusable block out of it.
7. Switch Your Post Display Between Grid and List View
This is one of those WordPress Site Editor features that’ really small but is still worth mentioning because a) it makes a big difference in the display of your posts on the page and b) it is easy to overlook.
What am I talking about?
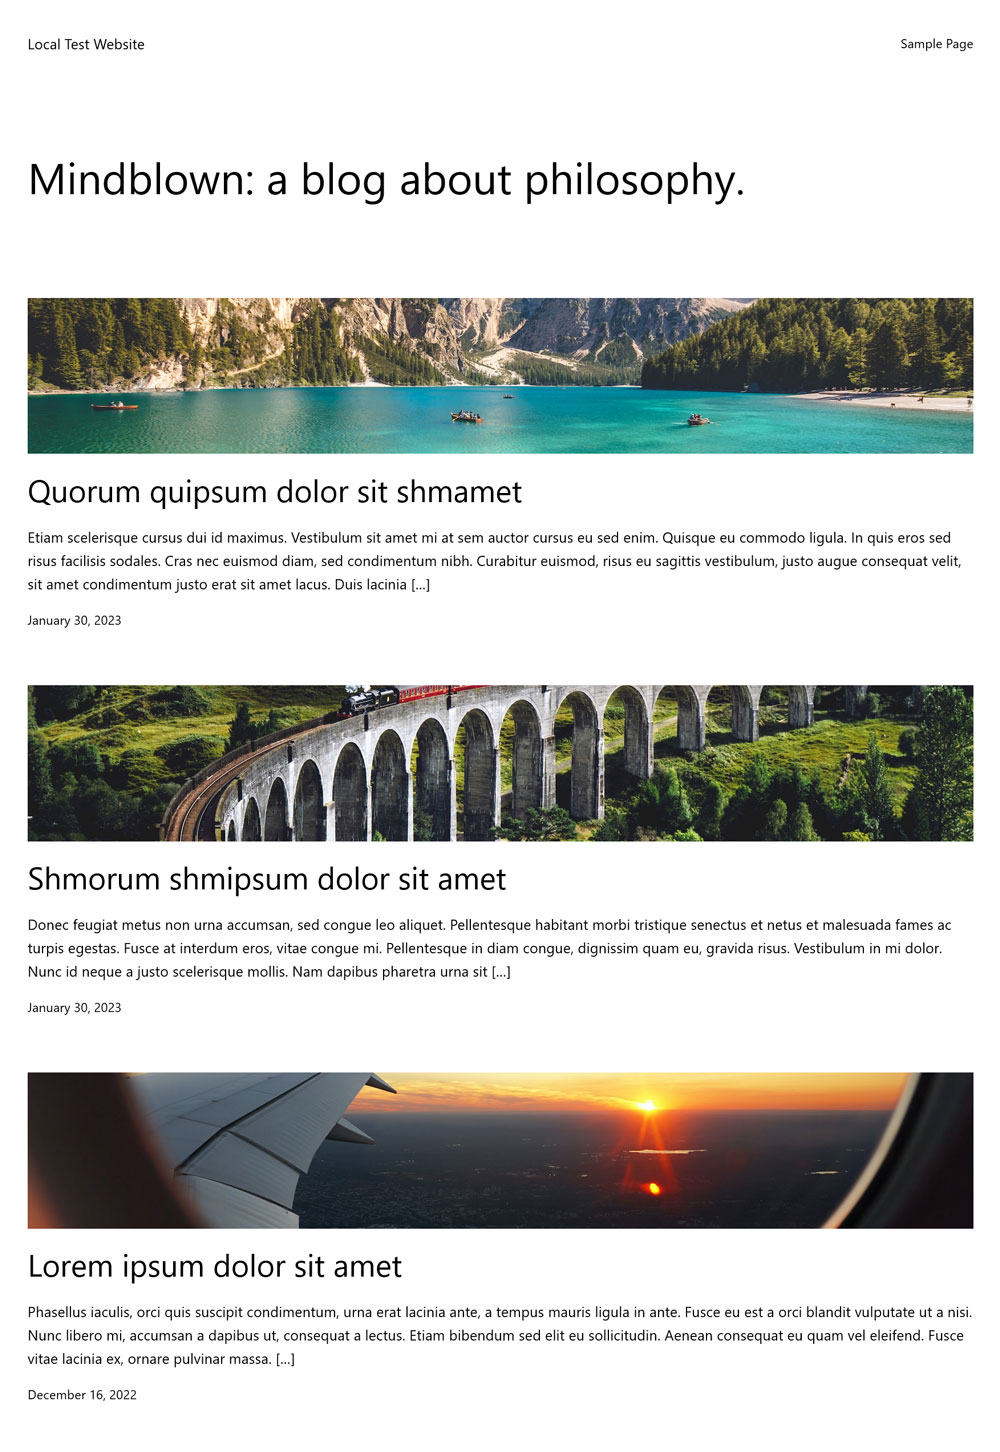
When using the Query Loop block to display a list of content anywhere on your site, you can switch it back and forth between a list and grid design in the top toolbar.
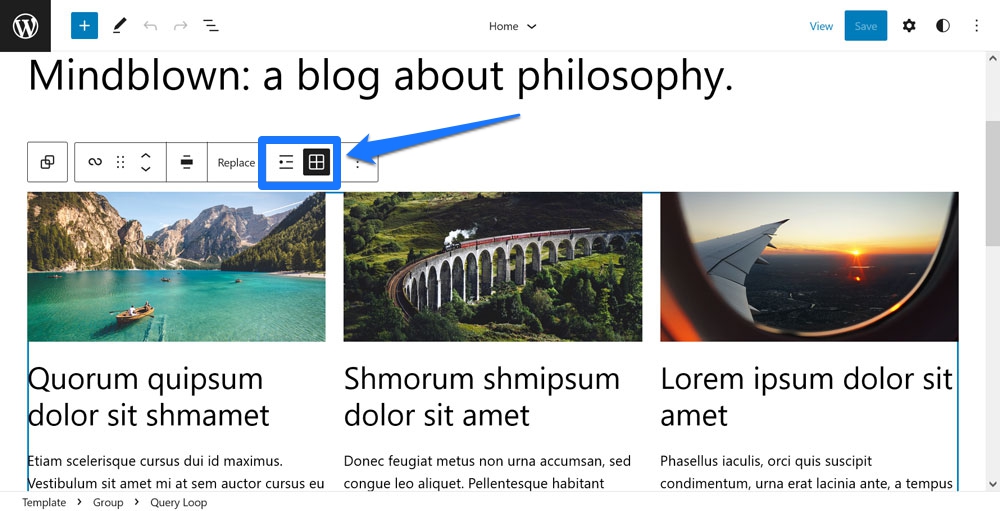
It will either arrange posts as a vertical list or in a pattern next to each other.
A small option that can make a big difference.
8. Show Last Modified Date in the Post Date Block
Another very small option that, however, can have a big impact. It regards the Post Date block, which is most often a default of the Query Loop. What’s easy not to notice is that it also has an option to show the last modified date. You can find it in the settings on the right when the Post Date block is active.

After you switch on the slider for Display last modified date, whenever you update your older content, WordPress will automatically show the new date on the page instead.
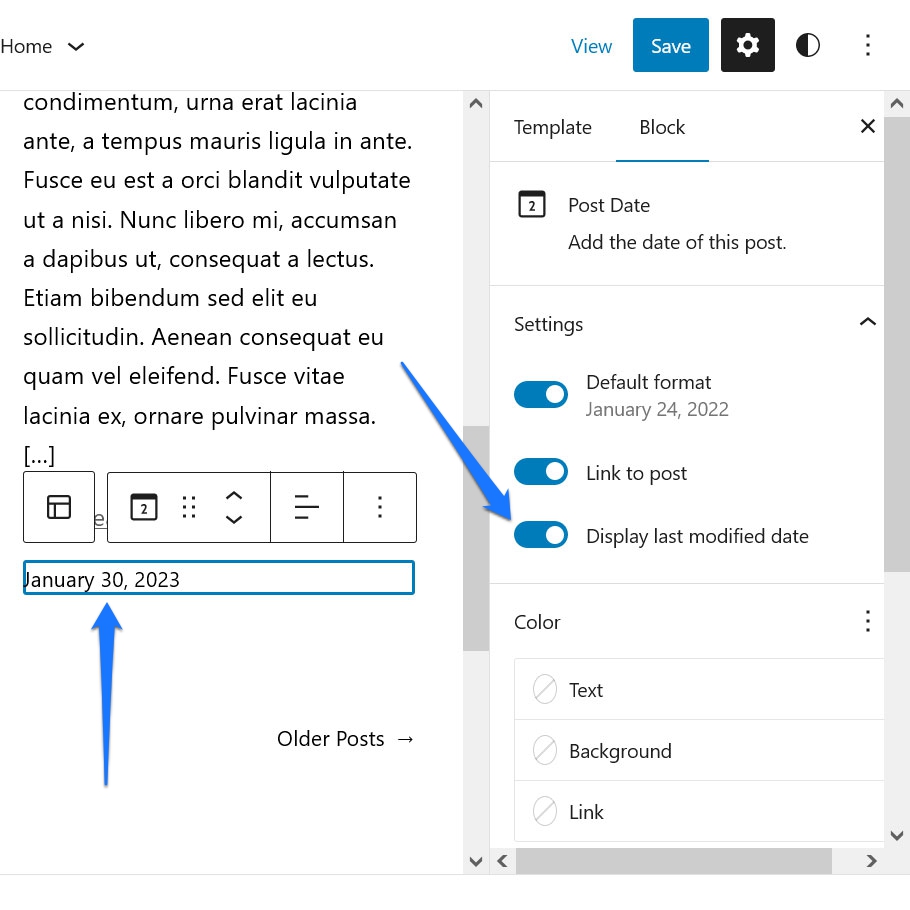
This is a great way to signal to search engines that you keep your content fresh. It’s also one less thing to think about when you do.
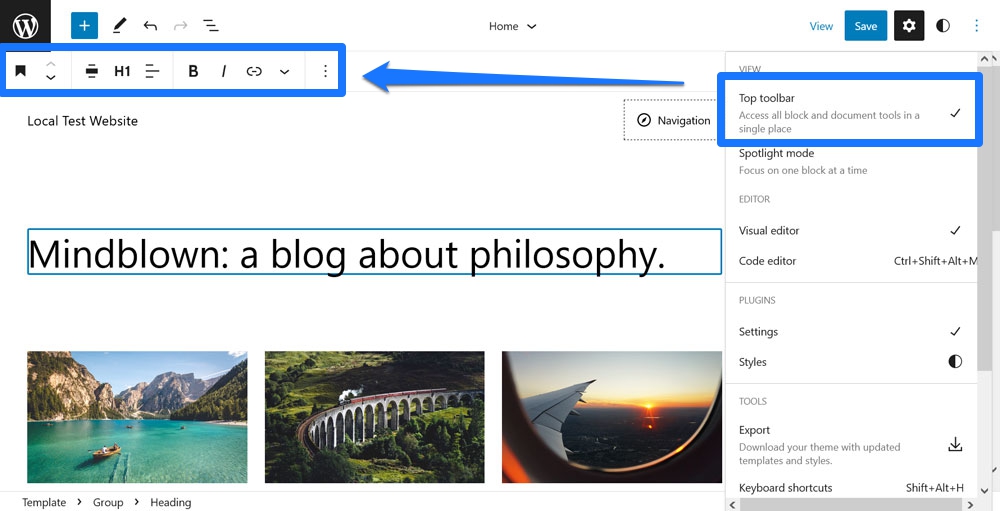
9. Move the Block Toolbar to the Top
If you have used the Site Editor or even just the Gutenberg post editor before, you are probably familiar with the fact that a toolbar with extra settings appears whenever a block is active.
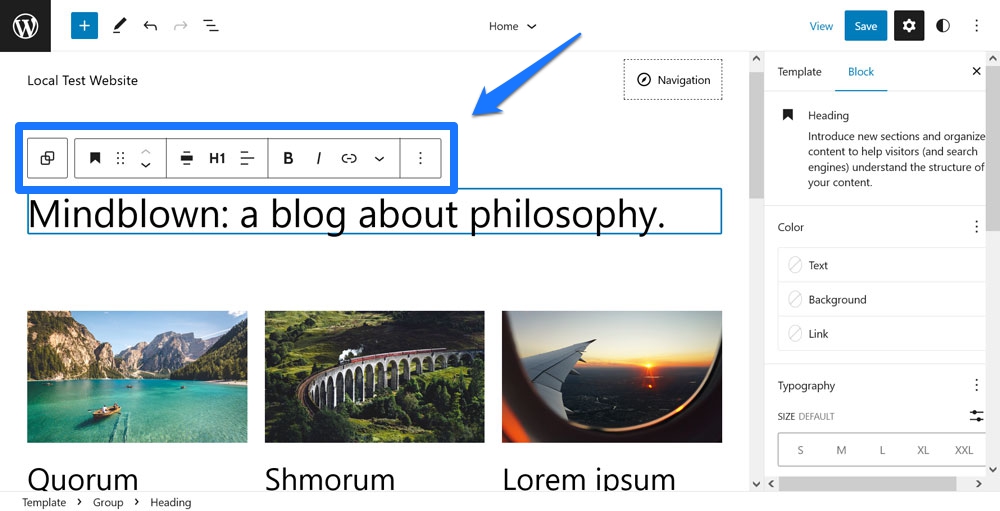
The problem is that it can sometimes be hard to reach, depending on your scrolling, or get in the way. What typically happens to me is that I double click a word in a paragraph just at top of the screen to mark it. Then the toolbar appears on the first click so the second immediately activates something in it.
Again, not a big thing but it can get annoying. If you find that it interrupts your workflow too much, in the Options menu (the three dots in the upper right corner) there is a menu item called Top toolbar. Click it, and from now on the toolbar of any block you choose will always appear on top of the editor. That way, you always know where to find it.
10. Export Modifications as Custom Themes
The final somewhat hidden because unassuming Site Editor feature is the Export function. You find it in the Options menu.

When you click it, you get a download prompt for your theme files. These include all the modifications you have made to both design and templates. You can use those to install the same theme on any other WordPress website and get the same styling.
While this might just seem like a normal feature, it’s actually a huge deal. It basically means that, with the Site Editor, you now have the possibility to build custom themes visually, without any coding, and make them available for other people. That’s something that, in the past, was purely in the realm of developers. Now, basically anyone can do it.
If want to get more granular about this, check out the Create Block Theme plugin. It allows you to export block themes, child themes, and style variations easily.
What Hidden Site Editor Features Did You Find?
The Site Editor is a powerful piece of software that offers a wide and growing variety of options to make changes to the design and layout of your WordPress site. Because of the amount it has to offer, you can be forgiven if you don’t know every single one of its features.
Above, we have gone over a few that you might not have been aware of before. From instantaneously changing your theme design with style variations, global styles for single blocks, the ability to install blocks on the fly, or simply small things like switching the post display from list to grid view and vice versa — there is a lot to discover.
Hopefully, learning these will motivate you to go spelunking around the available settings by yourself and improve your skills further.
What’s your favorite Site Editor feature that you have discovered? Please let us know in the comments below!
The post 10 WordPress Site Editor (FSE) Features You Didn’t Know About appeared first on Torque.
0 comments :
Post a Comment